
2-Day Itinerary For Zion National Park

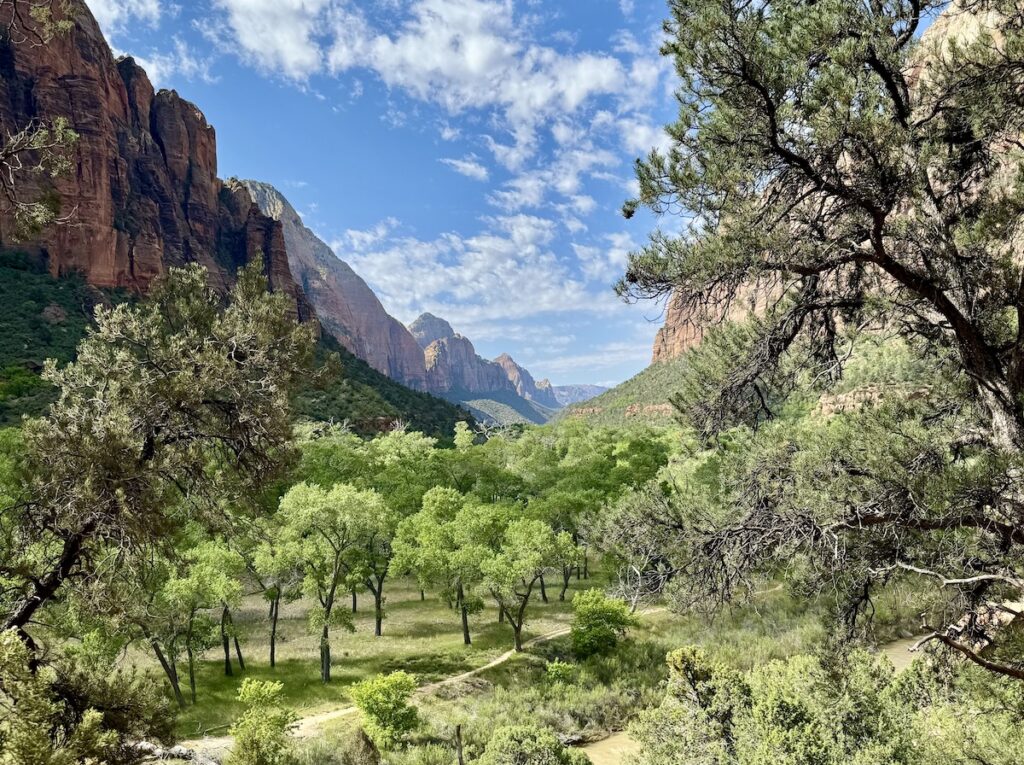
Zion National Park is one of the most visited national parks in the United States and easily one of the most stunning. Towering red rock cliffs, narrow slot canyons, hanging gardens, and scenic desert drives make this one of the most unique landscapes in the Southwest.
That said, Zion can also feel a little overwhelming to plan. The park gets extremely busy, parking fills early, most areas require the shuttle system for access, and the most popular hike — Angels Landing — requires a permit. Summer also brings intense heat and the largest crowds, which can have a huge impact on your experience if you don’t plan accordingly.
This 2-day Zion itinerary focuses on the park’s major highlights. Below I also include alternative itinerary ideas depending on your travel style — whether you want to avoid crowds or plan something less hiking-focused. You can mix and match days depending on your interests and energy level.

2-Day Itinerary Zion National Park
A few quick notes before we jump in: Zion Canyon is accessed primarily by shuttle for much of the year, although some visitors now choose to rent e-bikes instead. E-bikes allow more flexibility and can be one of the best ways to experience the canyon, but of course, they’re slower than the shuttle system.
No matter how you plan to get around, early starts are essential in Zion — especially from spring through fall when shuttle parking fills very early. In summer, plan to arrive well before the shuttle begins running if you hope to park inside the park. If you’re biking or staying in-park, I’d strongly consider starting your hikes around sunrise. Shuttle riders should aim for the first shuttles of the day.
If you’re visiting in summer, it’s also worth planning around the midday heat. Personally, I think Zion is best explored early in the morning and later in the afternoon, while using the hottest part of the day for lunch, relaxing at your hotel, or shorter and less strenuous activities.
I’ll go into more detail about the shuttle system, e-bikes, parking, and crowds later in this guide.
Day 1: Angels Landing, Emerald Pools & Sunset
This is the biggest hiking day of the itinerary and focuses on some of Zion Canyon’s most iconic trails. Start as early as possible today — not only for parking and shuttle logistics, but also to avoid hiking during the hottest and busiest part of the day.
Hike Angels Landing
One of the most famous hikes in Zion National Park is Angels Landing.
The hike is about 5.3 miles round trip with roughly 1,500 feet of elevation gain. Most of the trail follows a steep climb up Zion Canyon, including the infamous Walter’s Wiggles: a series of 21 tight switchbacks that climb dramatically up the canyon wall.
But the real reason this hike is so well known is the final half mile.
The last section follows a narrow sandstone ridge with steep drop-offs on either side and chain-assisted scrambling sections throughout. It’s genuinely not a good fit for anyone afraid of heights — even experienced hikers sometimes turn around before the final stretch. But if you’re comfortable with exposure, the views from the top are incredible and easily some of the best in the park.
One important thing to know is that Angels Landing now requires a permit for the chained section beyond Scout Lookout. Find permit details at Angel’s Landing Permits. If you don’t get a permit, I still think this hike is worth doing up to Scout Lookout. You’ll still get great canyon views without the exposed ridge section.
Also keep an eye out for California condors while hiking. They tend to nest in the area, making this one of the few places in the United States where you may spot these massive and incredibly rare birds.
Remember, this trail gets extremely crowded as the morning progresses and the heat can become very intense even early in the day. The earlier you can start, the better.
The trail begins from The Grotto shuttle stop (number 6) in Zion Canyon.
Picnic At Zion Lodge
After your hike, I recommend slowing things down a bit at Zion Lodge. It’s located just one stop away at Zion Lodge shuttle stop (number 5). Or you can follow the short, half mile Grotto Trail from Angels Landing trailhead to the lodge.
The lodge area has restrooms, water refill stations, shaded picnic areas, and a seasonal cafe, making it one of the best places in the park to take a break for a while. If you packed food, this is a great picnic stop. Otherwise, grab lunch from the cafe and relax under the huge cottonwood trees around the property.
If you’re visiting during the peak summer season, this is also a good opportunity to avoid the hottest part of the day. Personally, I think Zion is often best explored early in the morning and later in the afternoon during summer, rather than trying to force long hikes during midday heat and peak crowds.
From Zion Lodge, you’ll be just a short walk from your next trailhead.

Hike Emerald Pools
After lunch, spend the afternoon exploring the Emerald Pools trails.
This is one of the best effort-to-reward hiking areas in Zion National Park and a nice contrast to the intensity of Angels Landing earlier in the day. Instead of steep exposure and huge drop-offs, you’ll get hanging gardens, waterfalls, and relatively easy trails.
There are a few different ways to hike this area depending on how much energy you still have left.
If you want the easiest option, simply hike to Lower Emerald Pool and back. This short trail brings you to a small waterfall you can walk behind.
If you’re up for something a little longer, my favorite route is starting at Zion Lodge, hiking to Lower Emerald Pool, continuing up to Upper Emerald Pool, then returning via the Middle Emerald Pools Trail. This gives you a nice variety of scenery without becoming overly strenuous.
You could easily spend anywhere from an hour to several hours here depending on which route you choose and how slowly you want to move through the area.
This trail will get very crowded during the late morning and through midday in summer, so it may be worth doing in the late afternoon.


Sunset
If you still have energy at the end of the day, sunset is one of the best times to slow down and simply enjoy Zion Canyon.
Following the Pa’rus Trail to Canyon Junction Bridge is one of the most popular sunset spots in the park, with great views of the Watchman glowing orange in the evening light. Best of all, this is an easy paved trail that begins near the visitor center and follows the Virgin River, making it a perfect low-effort evening walk after a long hiking day. Crowds also tend to thin out significantly later in the evening.
If you’d rather drive, the Zion-Mt. Carmel Highway is also beautiful around sunset, especially east of the tunnel where the landscape opens up dramatically and crowds are usually lighter.
Day 2: The Narrows, Weeping Rock, Scenic Drives
Today combines another one of Zion’s most iconic hikes with one of the park’s most scenic drives. Compared to yesterday, this day is a little more flexible — you can make it very hike-heavy by spending hours in the Narrows, or keep things more relaxed by turning around earlier and spending more time exploring the east side of the park.
Once again, I’d strongly recommend starting early. The Narrows gets extremely crowded by late morning in summer, and hiking earlier in the day usually means cooler temperatures and a more enjoyable experience overall.
Riverside Walk & The Narrows
Today’s main focus is hiking the Narrows, one of the most unique hikes in the United States.
Unlike a traditional hiking trail, the Narrows follows the Virgin River directly through a narrow slot canyon with towering sandstone walls rising thousands of feet above you. In some sections, the canyon narrows to only 20 – 30 feet wide, creating one of the most unique hikes in the United States.
To access the Narrows, you’ll first follow the Riverside Walk — a beautiful 1 mile, paved trail that begins from the Temple of Sinawava shuttle stop (number 9), the final stop on the Zion Canyon Shuttle route.
Even if you don’t plan to hike into the river itself, the Riverside Walk is very much worth doing. The trail follows the Virgin River beneath massive canyon walls and passes hanging gardens, shaded sections of canyon, and some of the prettiest scenery in the park. (If you are here to hike the Narrows, do not rush through this section, it’s stunning!)
Once the paved trail ends, the Narrows begins.
One important thing to understand is that there’s no single turnaround point or “final destination” for this hike. Most visitors simply hike upstream until they feel ready to turn around. Orderville Canyon Junction (about 2 miles in) or Wall Street (about 3 miles in) are popular turning points. The further you go, the more the crowds will thin out, but you are not allowed to go past Big Spring (5 miles in) without a permit.
Remember, this hike can be more physically demanding than people expect. Walking directly through the river over slippery rocks takes more effort than a normal trail, and in some sections the water can be waist or chest deep (depending on the season and current water flow). Good footwear and a hiking pole are necessary.
If you’re visiting during colder months, you’ll need to rent dry pants from outfitters in Springdale. Water temperatures can feel extremely cold outside of summer and conditions change significantly throughout the year.
It’s also important to know that the Narrows frequently closes due to flash flood danger or high water flow, especially during spring snowmelt and monsoon season. It’s essential to check current conditions before your trip.
The average visitor spends around 3 – 5 hours here, although you can easily spend much longer if you want to hike deeper into the canyon.

Weeping Rock
After the Narrows, make a quick stop at Weeping Rock.
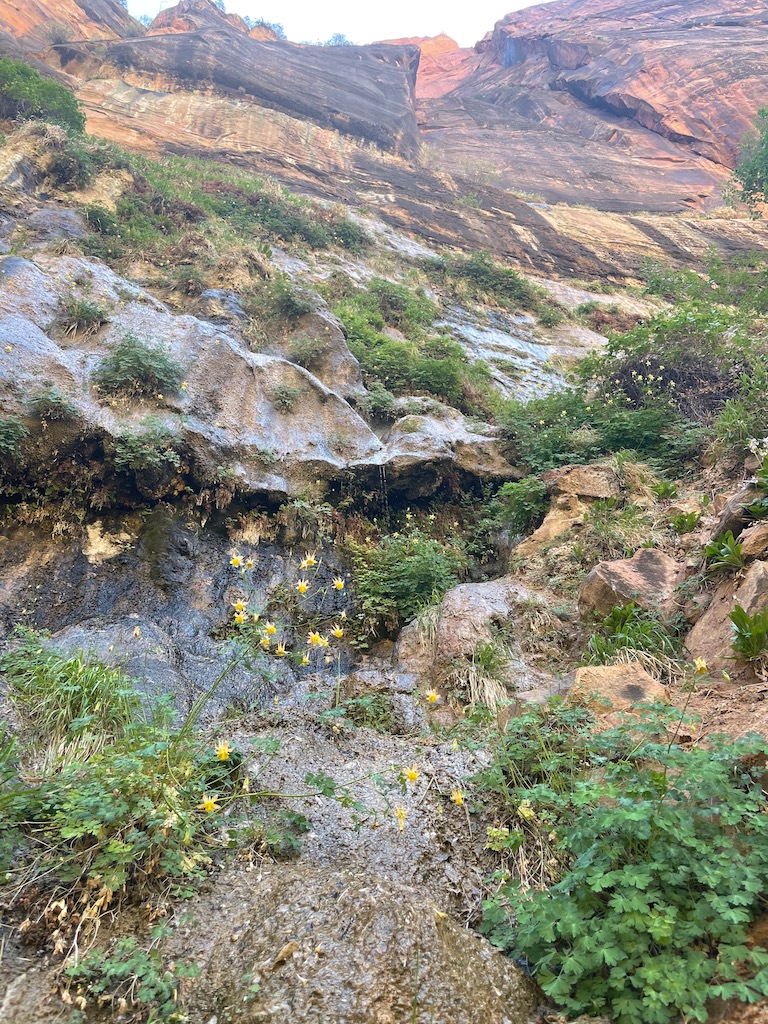
This short but very rewarding trail leads to a natural sandstone alcove where water slowly seeps through the rock face, creating hanging gardens and a constant dripping effect that gives the area its name.
The hike itself is only about .4 miles round trip, and depending on recent rainfall and water flow, the alcove can range from lightly misting to completely dripping overhead.
Weeping Rock is located at shuttle stop number 7 and doesn’t require much time, making it an easy addition to today’s itinerary.
Drive Zion-Mt. Carmel Highway
Next, spend some time exploring the Zion-Mt. Carmel Highway. This is a completely different section of the park from Zion Canyon and doesn’t require the shuttle system.
The landscape here feels very different from Zion Canyon — more open, rugged, and generally less crowded overall.
The drive passes through the historic Zion-Mt. Carmel Tunnel before climbing into the eastern section of the park, where you’ll find dramatic slickrock landscapes, huge sandstone formations, and numerous pull-offs with excellent views.
Keep an eye out for bighorn sheep along this stretch of road, especially east of the tunnel where they’re commonly spotted on the rocky hillsides.
One important thing to know: the tunnel operates as one-way traffic, which can create delays during busy periods. RVs and larger vehicles have additional restrictions and may require an escort fee.
Canyon Overlook Hike
Before leaving the east side of the park, make time for the Canyon Overlook Trail.
This short hike is only about 1 mile round trip, but the payoff is excellent for the amount of effort required. The trail follows sandstone ledges and rocky stair sections before opening up to sweeping views over Zion Canyon and the Zion-Mt. Carmel Highway below.
While this hike is considered relatively easy, there are some steep drop-offs and uneven sections along the trail, so it’s still important to wear proper shoes and pay attention while hiking.
One important logistical note: the trailhead is located immediately east of the Zion-Mt. Carmel Tunnel and parking here is extremely limited. There’s a very small lot for compact vehicles along with some roadside parking nearby, but spaces fill quickly throughout the day.
If possible, I’d try to time this hike for later in the afternoon or early evening when crowds begin to thin out a bit. It’s a nice spot for sunset!
Alternative Zion Itineraries
Not every visitor wants to tackle permit hikes or spend full days hiking, so below are a few alternative ways to structure your 2 days in Zion National Park depending on your travel style and interests.
If You Don’t Get An Angels Landing Permit
If you don’t get an Angels Landing permit — or simply don’t want to hike the chained section — you can still follow the trail up to Scout Lookout. You’ll get incredible canyon views without needing to continue onto the exposed ridge section, which requires a permit.
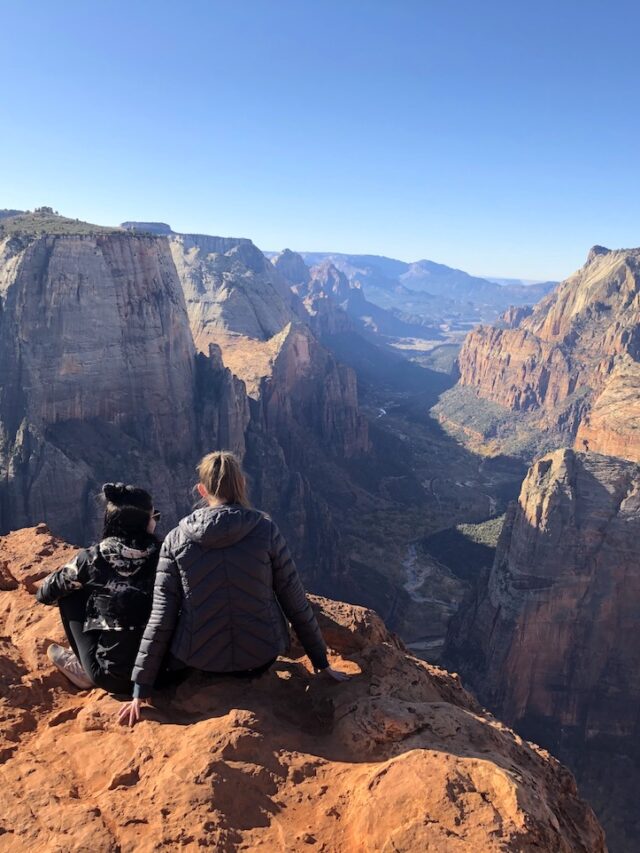
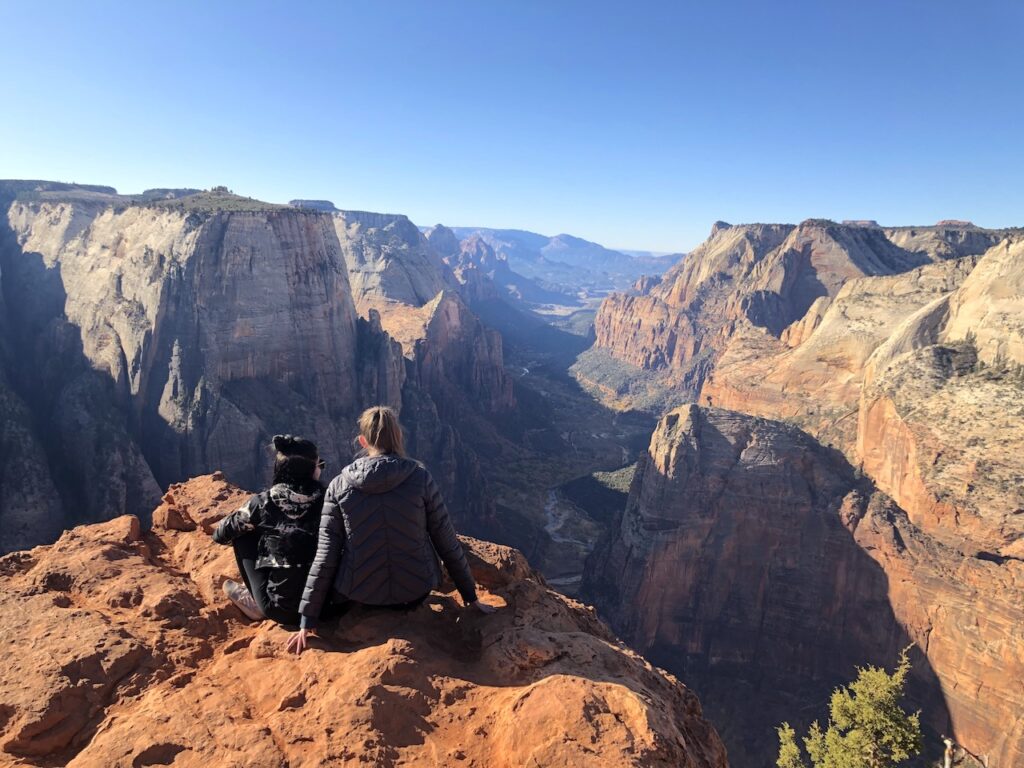
If you’d rather skip the hike altogether, I recommend replacing it with Observation Point via East Mesa Trail instead.
Personally, I think Observation Point has one of the best views in the entire park. The trail is longer than Angels Landing but far less intimidating, with sweeping panoramic views looking down into Zion Canyon from above.
One important thing to know is that this trail actually begins outside the park, on the far eastern side of Zion. Because of that, I’d pair this hike with the Zion-Mt. Carmel Highway scenic drive and Canyon Overlook Trail, then combine your Zion Canyon activities — like Emerald Pools, Riverside Walk, and the Narrows — into the other day of your trip.
Less Hiking-Focused Zion Itinerary
If you’re looking for a slower paced trip or simply don’t want to spend all day hiking, Zion is still absolutely worth visiting.
For Day 1, I’d focus on Zion Canyon itself. Start with the Riverside Walk and Weeping Rock in the morning before crowds build. Shuttle stop 8, Big Bend, is also worth a quick stop — this is one of the better places in the park to spot California condors soaring high above the canyon floor. When the birds are actively nesting in the area, park rangers are often stationed here to help visitors spot them.
Afterward, grab lunch or relax at Zion Lodge before hiking Lower Emerald Pool in the afternoon. End the day by following the Pa’rus Trail to Canyon Junction Bridge for sunset.
There are still quite a few hikes included on this day, but they’re significantly shorter and easier than those listed on the main itinerary.
For Day 2, spend time exploring the Zion-Mt. Carmel Highway and the east side of the park. Stop at scenic pull-offs, keep an eye out for bighorn sheep, and hike the short Canyon Overlook Trail. You could also add in a few more low-effort attractions around Zion Canyon, like the Zion Human History Museum near shuttle stop 2, located about a mile from the visitor center.
For more ideas, check out the Best Things To Do In Zion Besides Hiking and the Easiest Hikes In Zion National Park.
Less Crowded & Off-The-Beaten-Path Ideas
If you’ve already visited Zion Canyon before — or simply want to avoid the park’s busiest areas — consider spending part of your trip exploring some of the park’s lesser-visited sections.
Kolob Canyons, located about an hour from Zion Canyon, feels dramatically quieter and has several beautiful hikes including Taylor Creek Trail and Timber Creek Overlook. You’ll still get huge canyon views and dramatic scenery, just with significantly fewer people. I’d dedicate an entire day to this area rather than trying to combine it with Zion Canyon.
If you’re an experienced hiker looking for a more adventurous option, consider applying for a permit for The Subway (9 miles). This iconic slot canyon hike is one of the most sought-after hikes in Zion National Park, but because permits are limited, crowds are dramatically smaller. The route is much more physically demanding and route-finding can be tricky, but the scenery is incredible and feels far more remote than the main canyon hikes. You can find permit information at Zion Left Fork (Subway). This hike also deserves its own full day.
The east side of Zion is still fairly busy but tends to feel much calmer, especially once you move beyond the tunnel area. This part of the park has beautiful slickrock scenery, scenic drives, and quieter hiking opportunities. Observation Point via East Mesa Trail (7 miles) is one of the best hikes in this area. Depending on how many hikes and Zion-Mt. Carmel Highway pull-offs you include, this can range anywhere from a half-day to full-day itinerary.
And finally, if you still want to stay within Zion Canyon itself but avoid some of the most crowded trails, consider hikes like Watchman Trail (3.3 miles) or the West Rim Trail (14 miles), both of which tend to see fewer visitors.
Zion National Park Fees, Reservations & Permits
Zion National Park charges an entrance fee of $30, which is valid for 7 consecutive days. Most visitors will either pay the standard per-vehicle fee or use an America the Beautiful Pass.
Unlike some national parks, Zion does not currently require timed entry reservations to enter the park itself.
However, a few of Zion’s most popular hikes do require permits.
Angels Landing requires a permit for the chained section beyond Scout Lookout, while hikes like The Subway and the top-down Narrows route also require permits. You can find permit information at Zion National Park Permits.
Permit systems can change year to year, so it’s always worth checking current permit information on Zion National Park’s website before your trip.
Where To Stay Near Zion National Park
Where you stay can have a surprisingly big impact on your Zion trip, especially during the busy spring through fall months when parking and shuttle logistics become a major factor.
The only in-park lodging is Zion Lodge, which is by far the most convenient place to stay in Zion National Park. It’s especially helpful during peak summer season when crowds and heat are most intense. Staying here allows you to easily hit the trails at sunrise, rest in your room during the hottest part of the day, then return to the park in the late afternoon or evening. Rooms book very far in advance, especially from spring through fall.
If staying inside the park isn’t an option, I recommend staying in Springdale. The town sits directly outside Zion’s South Entrance, making it the most convenient base for accessing Zion Canyon. Springdale also operates its own shuttle system in summer, which helps visitors avoid some of the parking stress around the visitor center. Hotel prices here can be expensive, especially during peak season when rooms book out well in advance. Desert Pearl Inn is a good hotel consideration here.
For more affordable lodging, Hurricane (about 35 minutes away) and St. George (about 1 hour away) are often significantly cheaper than staying near the park itself. Just keep in mind that the additional driving time can make early starts much harder during busy seasons. Check out Wingate by Wyndham in Hurricane or Inn on the Cliff in St. George.
For more information and additional hotel recommendations, check out my guide to Where To Stay Near Zion National Park.
Camping
Zion National Park has three main campgrounds: Watchman Campground, South Campground, and Lava Point Campground (Kolob Canyons). Watchman Campground is the park’s most popular option thanks to its convenient location near the visitor center and shuttle system. Reservations are required and often book out months in advance during peak season.
If in-park camping is full, there are also many private campgrounds and RV parks around Springdale, Virgin, Hurricane, and the east side of the park. Dispersed camping is surprisingly limited near the park, though there are some BLM camping areas near Virgin and Hurricane, along with additional options farther from the park in places like Dixie National Forest.
Parking & Getting Around Zion National Park
Zion Canyon — the park’s most popular area — is accessed by shuttle for much of the year (typically March through November, and again during the holidays). During busy seasons, parking at the visitor center — where the shuttle begins — fills very early in the morning, and shuttle lines can become extremely long later in the day.
Springdale also operates its own free shuttle system in summer. It connects hotels and parking areas to the visitor center, which makes staying in town especially convenient.
E-bikes have also become extremely popular in Zion Canyon and are honestly one of the best ways to experience the park if you don’t mind a slower pace. One major advantage is being able to access the canyon before the shuttle system begins running in the morning. You’ll also have more flexibility and can avoid long shuttle lines, plus the scenic drive through Zion Canyon is beautiful by bike. Just keep in mind that summer afternoons can become extremely hot and Zion Canyon Scenic Drive is 8 miles each way. There are numerous rental shops in Springdale, book in advance.
Meanwhile, areas like Zion-Mt. Carmel Highway and Kolob Canyons remain accessible by private vehicle. Kolob Canyons Scenic Drive can close in winter due to weather.
Best Time To Visit Zion National Park
- Summer is the busiest and hottest time to visit. Temperatures inside Zion Canyon regularly climb above 100°F, early mornings and slower afternoons are essential. The park is lush and green this time of year.
- Fall is one of my favorite times to visit thanks to cooler temperatures and beautiful fall colors in November. Crowds are still large in early fall but will thin out as winter approaches.
- Winter is the quietest season and can feel like a completely different park. Many days are sunny and mild — though snow, ice, and trail closures are possible. The park’s hanging gardens and lush greenery are dormant this time of year, but you’ll find more wildlife in Zion Canyon this time of year.
- Spring brings lush waterfalls, greener landscapes, and pleasant temperatures, though snowmelt can impact hikes like the Narrows. Crowds will build during spring break and again as summer approaches.
I think late fall through early spring (excluding holidays) is the best time to visit Zion thanks to the smaller crowds and milder temperatures. That said, the park is arguably prettiest from late spring through fall — just keep in mind that crowds during this period can have a major impact on the overall experience.
I also have an entire post breaking down Zion by season in more detail: Best Time To Visit Zion National Park (What To Know About Each Season).
Zion National Park Weather
One of the most misunderstood things about Zion National Park is how much weather can vary throughout different sections of the park.
Most visitors spend their time in Zion Canyon, which sits at a lower elevation and tends to be significantly hotter than places like Kolob Canyons.
Meanwhile, the east side of Zion is generally more exposed and windier, while higher elevation areas can experience much cooler temperatures and heavy snow during winter and shoulder seasons.
Summer temperatures inside Zion Canyon regularly exceed 100°F, especially in July and August. Afternoon monsoon storms are also common during summer and can create dangerous flash flood conditions in slot canyons like the Narrows and The Subway.
No matter when you visit, it’s important to check forecasts for the specific sections of the park you plan to explore rather than assuming conditions are the same throughout Zion.
What To Pack For Zion National Park
What you pack for Zion depends heavily on the season, but there are a few things I’d consider:
- Good hiking shoes with traction (the terrain is very slippery here)
- Sun protection (hat, sunscreen, sunglasses)
- Layers for cooler mornings and evenings (especially in shoulder seasons)
- Light, breathable layers in summer
- Lightweight rain jacket
- Reusable water bottle or hydration pack
- Daypack for hikes
If you’re hiking the Narrows, you’ll also want water-friendly footwear and hiking poles. Additionally, depending on the season and water temperatures, you may need a dry suit rental.
Getting To Zion National Park
Most visitors enter Zion through the South Entrance near Springdale, which provides direct access to the visitor center, shuttle system, and Zion Canyon.
The East Entrance connects to Zion-Mt. Carmel Highway and is commonly used by visitors coming from Bryce Canyon, Page, or other parts of southern Utah.
The closest major airport is Harry Reid International Airport in Las Vegas, located about 2.5 – 3 hours from Zion depending on traffic and your exact destination. The closest regional airport is St. George Regional Airport, about an hour away.

I hope you found this 2-day Zion itinerary helpful in planning your trip. It’s one of my favorite national parks in the Southwest and I really do think it’s worth the effort and extra planning.
Any questions or additional ideas? Please leave a comment below or reach out on social media.
Looking for more ideas? Below are additional Utah and national park guides or head on over to Zion NPS.
More Information For Your Zion National Park Visit:
- Most Iconic Things To Do In Zion National Park
- The Best Things To Do In Zion (Besides Hiking)
- Easy Hikes In Zion National Park
- Where To Stay In Zion National Park
- Best Time To Visit Zion National Park (What To Know About Each Season)
Additional Utah Guides:
- Arches National Park Guides
- Bryce National Park Canyon Guides
- Canyonlands National Park Guides
- Moab, Utah Guides

Pin for later!



Keep Up With Amy!
Subscribe to the newsletter for the latest updates in your inbox. And don’t forget to connect on your favorite social platform!
Thank you!
You have successfully joined our subscriber list.